Jedi Remix-Os is now available to download from their official website and Many of the people have been asking questions regarding whether we can Dual Boot REMIX-OS with WINDOWS or not.
As in previous article we told you that REMIX-OS canonly be installed on a FAT32 file system. So here we go
Also Read before installing Remix-Os-
Pros and Cons of Remix Os- By ConvergeQuick Team Member David Vishnoi
So , Here is a full Guide on How to Dual Boot Remix Os with Windows -
Requirements -
A USB Drive
Official Remix Os
20GB Hard Disk Partition ( 16GB will also work but it should be FAT32)
EasyBCD 2.3
Step 1. Open Downloaded Remix Os zip file and extract it to the the root of new 16GB Partition that you created earlier .

Step 2. Insert USB Drive and format it with file system FAT32
Step 3. Now Open Remix Os USB Tool ( That you extracted ) .
Step 4. Choose ISO Image ( That you extracted ) and select USB Drive that you inserted .
Step 5. Now click on Ok and Install Remix Os on USB ,
Step 6. After Installing it on USB Drive , Copy all Files / Folders from USB and paste it to that 16GB Partition that you created earlier .
Step 7. Install and Open EasyBCD 2.3 .
Step 8. Click On "Add new Entry"

Step 9. Click On ISO

Step 10. Choose Path as Remix Os ISO from the 16Gb partition .

Step 11. Select Mode as Run from Disk
Step 12. Click on Add Entry .
Step 13. Click on Tools ( Upper left corner ) .
Step 14. Restart Computer !
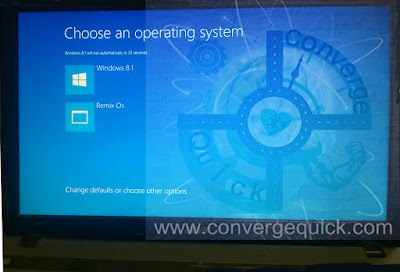
Now your Computer will restart , Whenever You will restart You will get 2 Options -
Windows
Remix Os
Choose Remix Os and Enjoy !

Select either "Guest Mode" or "Resident Mode (Permanent) " to start Remix OS , Guest mode will not save any data and is only for trying Remix Os , while Resident mode will save all data !

Note - If you want to Go to Your Windows OS then just Restart again !

0 comments:
Post a Comment